
Understanding the Importance of Testing Microphones
Why Test a Microphone Before Use
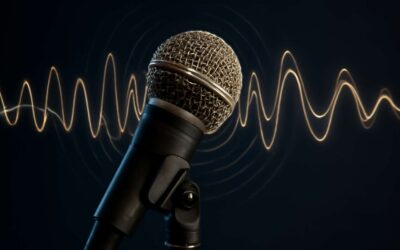
Imagine standing on the precipice of a grand performance, your voice echoing through vast auditoriums or intimate studio spaces. The power of a well-tested microphone can make all the difference, transforming a simple sound into an immersive experience. In this realm of sound, a test microphone becomes your enchanted tool—an essential guardian ensuring every whisper, note, and declaration is captured flawlessly.
Why test a microphone before use? It’s akin to a knight checking his armor before battle—vital for uncovering hidden flaws and ensuring peak performance. A thorough test microphone session reveals issues like static, distortion, or misalignment that could otherwise tarnish your sound quality. Without this ritual, even the most talented voice can be lost amid technical imperfections, undermining your message or performance.
In the end, a meticulous test microphone process is an investment in clarity and confidence. It allows you to harness the true potential of your equipment, transforming ordinary recordings into extraordinary auditory adventures. After all, in the world of sound, precision is your most loyal ally—test microphone with care and let your voice truly resonate!
Common Situations Requiring Microphone Testing
Understanding the importance of testing microphones extends beyond mere routine; it taps into the very essence of sound integrity and audience engagement. In South Africa’s vibrant performance scenes—from bustling radio stations to dynamic live stages—the need to test microphone before crucial moments cannot be overstated. Each untested microphone harbors potential pitfalls: static interference, uneven sound pickup, or subtle misalignments that, if left unchecked, can distort the entire auditory experience.
Common situations demanding a thorough test microphone include preparing for a high-stakes conference, recording in a professional studio, or setting up for a live musical performance. These scenarios highlight how vital it is to identify issues early—preventing technical mishaps that could mar the clarity of your voice or instrument. Often, a simple test microphone can reveal hidden flaws, ensuring the equipment is primed for optimal performance. It’s a safeguard that transforms uncertainty into confidence, especially when every detail counts.
Key Benefits of Proper Microphone Testing
In the vast realm of sound, where every whisper and roar shapes the experience, the importance of a thorough test microphone cannot be overstated. When a microphone’s voice is pure and unblemished, the audience is transported into a world where clarity reigns supreme. This act of testing is not merely routine but a sacred ritual—an invisible spell cast to safeguard sound integrity.
Proper microphone testing unveils hidden flaws that could sabotage a performance or broadcast. It ensures that static interference, unbalanced sound pickup, or subtle misalignments are caught before they weave their disruptive magic. The benefits are profound: seamless sound delivery, unwavering confidence in your equipment, and an audience captivated by pure auditory enchantment. Remember, in the realm of sound, every detail matters—making test microphone an essential step in every high-stakes event or recording session.
Types of Microphone Tests
Basic Sound Check
When it comes to ensuring your voice commands or musical masterpieces come through crystal clear, understanding the basic sound check for a test microphone is crucial. Surprisingly, a simple test microphone can reveal more than just static and hum; it uncovers hidden quirks that might sabotage your performance. The initial step often involves a straightforward audio check, where you speak or sing into the microphone while monitoring the output through speakers or headphones. This basic sound check helps identify issues like muffled sound, distortion, or uneven volume levels—problems that can turn a live event into an unintended comedy show.
For a more thorough approach, consider these elements during your test microphone session:
- Check the microphone’s connection—loose cables are the enemy of sound quality.
- Adjust the gain to avoid clipping or overly quiet outputs.
- Test the microphone’s frequency response by varying your voice or instrument tone.
A good test microphone session isn’t just about avoiding embarrassment; it’s about mastering the art of pristine sound delivery. After all, no one wants to be that person whose microphone turns their keynote into a muffled monologue.
Frequency Response Test
The frequency response test is an essential component of a comprehensive test microphone procedure. It’s not just about hearing your voice clearly; it’s about understanding the spectrum of your sound and how faithfully your microphone captures it. When you perform a frequency response test, you’re essentially probing the microphone’s ability to reproduce different pitches and tones, revealing its strengths and weaknesses. This nuanced analysis can expose subtle flaws that might otherwise go unnoticed, such as a muted bass or an overly sharp treble, which could distort your performance.
During this test, you might find it helpful to use a tone generator or specific sound samples that span the entire audible range. This way, you get a detailed map of how your test microphone responds across frequencies. Sometimes, an ordered approach—testing from low to high frequencies—can uncover irregularities that are critical for professional sound delivery. Ultimately, this type of microphone test is about ensuring authenticity and clarity in every word or note, elevating your sound from mere transmission to an immersive experience.
Sensitivity and Noise Level Assessment
When it comes to ensuring your microphone performs at its peak, understanding the nuances of sensitivity and noise level assessment is paramount. A high-sensitivity test microphone can pick up even the faintest whispers, but without proper calibration, this sensitivity can work against you—amplifying unwanted background noise or hiss. Conversely, a microphone with poor sensitivity may leave your voice lost in the mix, undermining clarity and professionalism.
Noise level assessment, on the other hand, scrutinizes how much ambient sound your test microphone picks up when it should be capturing only your voice. This step is vital in distinguishing between a microphone that faithfully reproduces sound and one that introduces distracting noise. For those seeking a crisp, interference-free audio experience, evaluating both sensitivity and noise levels during testing can reveal hidden flaws that compromise sound quality.
Often, a simple test microphone involves using a calibrated sound source and measuring the output to identify irregularities. An effective approach might include:
- Checking the microphone’s response to quiet sounds for sensitivity
- Listening for background noise and hum levels
- Assessing the signal-to-noise ratio, which indicates clarity
By meticulously conducting these assessments, professionals and enthusiasts alike can guarantee their microphone’s fidelity, ensuring every word or note is captured with pristine accuracy. After all, in the realm of sound, it’s the subtle details—often overlooked—that make the difference between mediocrity and mastery.
Durability and Connectivity Testing
In the symphony of sound, a microphone’s resilience is its silent oath—an unspoken promise to endure the rigors of performance and environment. Durability testing reveals whether a test microphone can withstand the tempest of daily use, from humid studio sessions to rugged outdoor recordings. A robust microphone won’t falter at the first hint of dust or sudden jolt, ensuring your investment remains steadfast and reliable over time.
Connectivity, often overlooked, is the lifeline that breathes vitality into a test microphone. Whether via XLR, USB, or wireless channels, each connection type carries its own demands and vulnerabilities. Conducting comprehensive connectivity tests involves checking for consistent signal transmission, absence of dropouts, and compatibility with a range of devices. An unreliable connection can sabotage even the most precise sound, turning clarity into chaos.
- Assessing cable integrity
- Verifying wireless stability
- Ensuring seamless device pairing
When a test microphone faces the gauntlet of durability and connectivity testing, it reveals its true character—resilient, adaptable, and ready to serve the voice of professionalism. Only then can one be assured that every word, note, or nuance reaches its destination unblemished, in a realm where sound is king and precision reigns supreme.
How to Perform a Microphone Test
Using Built-in Testing Features
In the bustling world of audio production, knowing how to test microphone built-in features can be a game-changer. Modern devices often come equipped with intuitive testing tools that allow you to perform quick and accurate sound checks without additional equipment. These features can help detect issues like static, distortion, or connectivity problems early on, ensuring your setup is pristine before any critical use.
Typically, accessing these built-in testing features involves navigating through your device’s settings menu. Once there, you’ll find options labeled “Microphone Test” or similar. Activating this function will usually prompt you to speak into the microphone while a visual indicator or real-time sound wave display shows the response. This immediate feedback can help identify if your microphone is capturing sound properly or if adjustments are needed.
For a thorough assessment, you might follow these steps:
- Open the device settings or sound control panel.
- Select the microphone testing option.
- Speak into the microphone and observe the visual feedback.
- Adjust the microphone position or settings if the response is weak or inconsistent.
Using built-in testing features simplifies the process, making it easier to ensure your microphone is ready for any recording, streaming, or live performance. It’s a reliable way to perform a test microphone check anytime, anywhere—saving you from unexpected audio mishaps and delivering crystal-clear sound every time.
Manual Testing with Software
Performing a manual test microphone process is like casting a spell to reveal hidden secrets within your audio gear. With the right software, you can transform your computer into a mystical portal that reveals the true voice of your microphone. This process not only uncovers static or distortion but also ensures your sound is crisp and clear before any critical recording or streaming session.
To start, select a reliable microphone testing software—many free options are available that offer real-time visual feedback. Once installed, open the program and choose your microphone from the list of available devices. Speaking into the mic should generate animated sound waves or visual indicators that dance across the screen, confirming your microphone’s responsiveness. If the visual feedback is weak or inconsistent, it may signal a need for adjustment or further inspection.
For a comprehensive assessment, consider following these steps:
- Open your chosen microphone testing software.
- Select your microphone device from the list.
- Begin speaking into the microphone and observe the visual feedback.
- Adjust the microphone’s position or settings based on the response.
This method of manual testing with software offers an immersive experience—unveiling the hidden nuances of your microphone’s performance and ensuring it’s primed for any sound adventure that awaits. Embrace the magic of technology, and let your microphone whisper its true voice!
Testing with Recording Devices
Performing a test microphone with recording devices can reveal the hidden depths of your audio setup, transforming a simple sound check into a ritual of discovery. When you record directly through your device, you gain invaluable insight into the true voice of your microphone—its clarity, warmth, and potential flaws. This process isn’t just about verifying functionality; it’s about embracing the artistry behind sound.
To ensure your microphone is performing at its peak, consider these steps: Begin by recording a short segment of speech or singing, capturing the nuances of your voice. Play back the recording and listen carefully for any static, distortion, or unwanted noise. If issues are present, adjustments to microphone positioning or settings may be necessary.
- Set up your recording device with a compatible microphone.
- Record a test phrase or sound in a quiet environment.
- Review the playback attentively, noting any irregularities.
Every detail matters; a well-executed test microphone session ensures your sound quality is pristine, whether for professional podcasts, streaming, or critical recordings. It’s a vital step—your gateway to capturing authentic, high-fidelity audio that resonates with clarity and precision.
Testing Microphone in Different Environments
Performing a test microphone in different environments is essential to ensure your audio setup remains versatile and reliable. Each space has its unique acoustic signature—what works flawlessly in a quiet studio may falter amidst bustling streets or echoing halls. To truly understand how your microphone performs across varied settings, it’s vital to simulate those conditions during testing.
Start by choosing the environment where you’ll most frequently use your microphone. For indoor spaces, consider rooms with minimal background noise and reflective surfaces. For outdoor testing, select a location that mimics your typical use, such as a park or urban street, but be mindful of ambient sounds that could skew your results.
Incorporate these steps for comprehensive testing:
- Record a standard phrase or sound sample in each environment.
- Compare the recordings, paying close attention to clarity, background noise, and any distortion.
- Adjust microphone placement and settings based on your observations to optimize performance across environments.
By embracing the nuances of different surroundings during your test microphone process, you ensure your sound quality remains pristine, whether broadcasting from a studio, streaming from your home, or capturing audio on location. This meticulous approach promotes an understanding that in audio, context is everything, and every environment shapes the story your microphone tells.
Tools and Equipment for Microphone Testing
Testing Software Options
In the quest to perfect the sound quality of your microphone, selecting the right tools and equipment for a comprehensive test microphone process becomes paramount. While high-end testing software can seem daunting, it provides invaluable insights into the intricate nuances of microphone performance, from frequency response to sensitivity. A well-chosen testing software option can reveal hidden flaws that might otherwise sabotage a recording’s clarity or durability.
For those who prefer a more tactile approach, manual testing with specialized recording devices offers a hands-on perspective, allowing you to gauge real-world performance across various environments. Additionally, some advanced testing software options incorporate built-in features such as real-time waveform analysis, noise level assessments, and connectivity diagnostics, making them indispensable in any professional’s toolkit.
Ultimately, investing in the right tools for your test microphone endeavor—be it robust testing software or precise hardware—ensures your microphone is primed for peak performance, whether in the studio or on stage. Remember, a thorough test microphone process is not merely a technical necessity but a safeguard for sonic excellence.
Sound Level Meters
When it comes to ensuring your microphone performs flawlessly, the right tools and equipment are vital. Sound level meters are among the most crucial devices in a test microphone setup, providing precise measurements of sound pressure levels (SPL). These meters help detect any anomalies in volume or unwanted noise that could compromise audio quality. For professionals in South Africa seeking sonic clarity, investing in a reliable sound level meter guarantees accurate readings across various environments.
For a comprehensive test microphone process, consider using a combination of hardware and software tools. An ordered list of essential equipment might include:
- High-quality sound level meter
- Calibrated recording device
- Ambient noise analyzer
Using these tools allows for a detailed analysis of microphone performance, from sensitivity to noise levels. Whether testing in a controlled studio or on a bustling stage, proper equipment ensures your microphone is up to the task, delivering pristine sound every time. Remember, a well-equipped test microphone process isn’t just about technical perfection—it’s about capturing the true voice of your environment with clarity and confidence.
Audio Interface and Connectors
When embarking on a meticulous test microphone process, the role of a reliable audio interface and connectors cannot be overstated. These components serve as the critical bridge between your microphone and the rest of your sound system, ensuring pristine signal transfer. Quality connectors—such as XLR or TRS—are designed to minimize signal degradation, preventing unwanted noise and interference that could obscure your audio clarity.
An efficient audio interface amplifies the microphone’s output with remarkable precision, allowing detailed analysis of sensitivity and noise levels. For professionals in South Africa, selecting an interface with robust build quality and versatile connectivity options guarantees durability and compatibility across diverse recording environments. Consider interfaces that offer phantom power, low latency, and multiple input/output options to adapt seamlessly to your testing requirements.
Moreover, integrating a range of connectors—like balanced cables and adapters—streamlines the testing process, enabling your setup to accommodate various microphone types and configurations. A well-chosen combination of hardware tools ensures that every nuance of your microphone’s performance is captured, giving you confidence in its reliability and sound fidelity. Ultimately, an optimal test microphone setup hinges on high-quality audio interfaces and connectors, turning technical precision into sonic perfection.
Calibration Tools
Accurate calibration tools are the backbone of a reliable test microphone process. Without precise measurement instruments, even the most sophisticated equipment risks delivering skewed results. These calibration tools help ensure your microphone’s sensitivity, frequency response, and noise levels are accurately gauged. In South Africa’s diverse recording environments, having dependable calibration equipment prevents costly inaccuracies and guarantees consistent performance.
One essential device is the sound level meter, which measures the sound pressure levels produced by the microphone during testing. When used alongside specialized software, these tools allow for meticulous adjustments and fine-tuning. For those seeking a comprehensive setup, a calibration microphone paired with a digital audio analyzer offers a level of precision that elevates your test microphone process from ordinary to exceptional.
Investing in quality calibration equipment not only enhances the accuracy of your test microphone but also extends the lifespan of your entire sound system. Whether testing in a professional studio or on-site, these tools provide peace of mind, confirming that every audio signal captured is true to the source. Remember, in the realm of audio testing, precision isn’t optional — it’s everything!
Interpreting Microphone Test Results
Understanding Test Measurements
Interpreting microphone test results can feel like deciphering an alien language—until you know what to look for. When you conduct a comprehensive test microphone procedure, the goal is to gauge whether the device performs optimally across various parameters. Think of it as giving your microphone a health check-up; the results reveal its true vocal prowess.
One key aspect is understanding the frequency response, which indicates how well the microphone captures a broad range of sounds without distortion. If the test microphone results show irregularities here, it might be time for a calibration or even a replacement. Additionally, paying attention to sensitivity and noise level assessments helps determine if the microphone picks up subtle nuances or if it’s plagued by unwanted hiss.
To make sense of complex data, some professionals prefer using sound level meters or specialized testing software. These tools transform raw measurements into actionable insights, ensuring your microphone is ready to deliver crystal-clear audio every time.
Identifying Common Microphone Issues
Interpreting microphone test results often feels like solving a complex puzzle—each piece revealing vital clues about the health of your equipment. When analyzing the output from a test microphone, it’s essential to identify common issues that can compromise audio quality. Distortion, for instance, may manifest as a harsh or muffled sound, indicating the microphone is overloaded or misaligned. Similarly, a sudden drop in sensitivity could point to damaged components or poor connections.
One of the most telling signs of a problematic test microphone is inconsistent frequency response. Irregularities here suggest that certain sound ranges are either exaggerated or suppressed, which could distort your final audio. If you notice persistent background noise or hiss during testing, it’s a clear signal that noise level issues need attention. Recognizing these common issues early helps prevent costly repairs and ensures your microphone performs at its best every time you conduct a test microphone procedure.
When to Seek Professional Help
Interpreting test microphone results can sometimes feel like deciphering an ancient script—each anomaly hints at underlying issues that could compromise your audio fidelity. When analyzing these results, it’s crucial to distinguish between minor fluctuations and genuine problems requiring attention. A sudden increase in background noise or persistent hiss might suggest interference or faulty connections, while irregularities in frequency response could point to more insidious issues like damaged diaphragms or misaligned components.
Seeking professional help becomes essential when the test microphone results reveal consistent distortions, unexplained drops in sensitivity, or persistent anomalies that do not resolve with simple troubleshooting. Expert technicians possess the calibration tools and diagnostic expertise necessary to diagnose complex problems accurately. In such cases, investing in professional assessment not only preserves your equipment’s longevity but also ensures that your audio recordings maintain the clarity and professionalism your audience expects.
Tips for Choosing a Microphone for Testing
Factors to Consider
Choosing the right test microphone can feel akin to selecting a mystical instrument capable of revealing unseen sonic realms. When embarking on this quest, consider the environment in which the microphone will be used—whether a bustling studio or a quiet conference hall. The acoustic landscape dramatically influences which features matter most, such as frequency response and sensitivity.
A wise adventurer knows to evaluate durability and connectivity, ensuring the test microphone withstands the rigors of daily use while maintaining a clear connection. For those seeking precision, exploring built-in testing features or software options can unveil hidden performance nuances.
To aid in your selection, keep in mind that a versatile test microphone often offers multiple connection types and calibration compatibility. This ensures consistent results across various testing scenarios, ultimately helping you uncover the microphone’s true potential.
Popular Microphone Brands for Testing
When selecting a test microphone, especially from popular brands, understanding what makes each brand stand out can save you time and frustration. Renowned manufacturers like Shure, Rode, and Audio-Technica have built reputations on durability and precision, making them reliable choices for rigorous testing environments. Their microphones often come with features that enhance testing accuracy, such as wide frequency response and robust connectivity options.
To truly gauge a test microphone’s suitability, consider exploring the specific strengths of these brands. For instance, Shure microphones excel in durability, making them ideal for field testing, while Rode offers exceptional sensitivity and clarity, perfect for studio settings. When shopping, evaluate whether the microphone’s connection types—such as XLR or USB—align with your testing setup. This ensures seamless integration and consistent results across various scenarios.
Ultimately, selecting a test microphone from a trusted brand means investing in performance, reliability, and peace of mind. Remember, a well-chosen microphone not only reveals the true quality of audio but also withstands the test of time and usage. In South Africa’s diverse environments, opting for a reputable brand can make all the difference in uncovering authentic sound landscapes.
Budget-Friendly vs. Professional Microphones
When it comes to choosing a test microphone, balancing your budget with your professional aspirations can feel akin to walking a tightrope over a veldt of uncertainty. Budget-friendly microphones often provide surprisingly decent results, especially if your testing needs are occasional or rudimentary. These models tend to prioritize affordability over bells and whistles, making them perfect for beginners or casual testers.
On the other hand, professional microphones for testing are engineered with meticulous precision, offering superior sound clarity, durability, and consistent performance. If your testing environment involves rigorous, daily use or critical audio analysis, investing in a high-end test microphone can save you headaches down the line.
A wise approach involves evaluating your specific requirements. For instance, if you need a test microphone for field testing in South Africa’s diverse environments, durability and connectivity options become paramount. Conversely, for studio-based testing, sensitivity and frequency response may take precedence. Remember, whether budget-friendly or professional, the right test microphone is one that aligns seamlessly with your unique testing landscape—ensuring your sound is always on point.
Optimizing Microphone Performance
Proper Placement and Setup
Achieving pristine sound quality begins with the proper placement and setup of your test microphone. In rural South Africa, where ambient noise and environmental factors can vary dramatically, it’s essential to position your microphone carefully. A well-placed microphone captures the richness of local voices and natural sounds, creating an authentic listening experience.
Start by ensuring the microphone is at the correct height and angle, ideally pointing directly toward the sound source. Avoid placing it too close to reflective surfaces like walls or windows, as this can cause unwanted echoes or sound distortion. Instead, opt for a quiet, stable environment that minimizes background noise, allowing your test microphone to deliver accurate readings.
When setting up, consider using a simple
- placement checklist
to optimize performance. This includes checking the distance from the sound source, adjusting the angle for clarity, and ensuring secure connections. Proper setup not only enhances sound quality but also extends the lifespan of your microphone, making it a vital step in any comprehensive testing process.
Regular Testing and Maintenance
Maintaining peak performance of your test microphone requires ongoing regular testing and meticulous maintenance. In environments like rural South Africa, where unpredictable environmental factors can impact sound quality, consistency is key. By establishing a routine check, you ensure that your microphone remains sensitive to the nuances of local voices and natural sounds, preserving authenticity and clarity.
Implementing a simple maintenance schedule can dramatically extend the lifespan of your test microphone. This might include inspecting connections, cleaning the grille, and verifying calibration settings. Regular testing also helps identify early signs of wear or potential issues, preventing costly repairs or replacements down the line. Remember, a well-maintained microphone is not just about sound quality; it’s about safeguarding your investment and ensuring reliable performance in every recording session.
To streamline this process, consider using specialized testing tools or software, which can provide detailed insights into your microphone’s condition. Whether you’re assessing sensitivity, frequency response, or connectivity, routine evaluations are the cornerstone of professional audio work. Consistent testing and maintenance of your test microphone empower you to capture sound with precision, no matter where your project takes you in South Africa’s diverse landscape.
Acoustic Treatment Tips
Optimizing your test microphone’s performance extends beyond mere calibration; it demands a nuanced understanding of acoustic treatment. In diverse environments—like the rugged terrains of South Africa—sound waves behave unpredictably, making acoustic harmony essential for true clarity. Properly treating your recording space can significantly enhance the sensitivity and frequency response of your test microphone, ensuring every nuance of local voices and natural sounds is captured authentically.
Consider the environment’s influence on sound reflection and absorption. Soft materials like acoustic panels or even household items such as blankets can tame echoes and minimize unwanted noise. These simple adjustments create a controlled acoustic environment, allowing your test microphone to perform at its peak. When the surroundings are optimized, even the most budget-friendly microphone can deliver professional-quality recordings, revealing subtle sonic details otherwise masked by ambient disturbances.
To further refine performance, employing specialized acoustic treatment tips—like positioning your test microphone at optimal distances or angling it to reduce reflections—can make a profound difference. Remember, the goal isn’t just to test the microphone but to craft a space where its full potential can be realized. This thoughtful approach transforms a basic test microphone into a tool capable of capturing the soul of sound, no matter where in South Africa you are recording.
0 Comments