
Understanding Boya Audio Gear
A Brief Overview of the Boya Brand
Few audio brands have penetrated the South African market as quietly as Boya. The company, founded in Shenzhen, has become a staple for content creators from Johannesburg to Cape Town. Their gear balances affordability with a ruggedness that survives unpredictable weather on outdoor shoots. I have seen a boya microphone outlast gear costing twice as much.
The range includes:
- Wireless clip-on systems for interviews
- Compact shotgun microphones for cameras
- Smartphone plug-and-play units
Boya strips away what does not serve the recording. No proprietary cables. No bloated software. Just functional audio capture! That approach resonates with creators who need dependable sound without a steep learning curve.
The Difference Between Wired and Wireless Systems
Nearly 80% of South African creators choose a Boya microphone for their first serious audio upgrade. That popularity is not accidental. The brand offers two clear paths: wired and wireless systems. Each serves a distinct purpose.
A wired Boya microphone delivers absolute reliability. You plug it in, and the signal never drops. For a fixed podcast setup or a studio interview, this is the sensible choice. There is no battery anxiety and no latency to consider. The sound is consistently clean because the connection is direct.
A wireless Boya microphone, however, frees you from the cable. You can move around a classroom, walk through a market stall, or present a cooking segment without trailing wires. The trade-off is simple: you manage power and pairing. Modern units handle both quickly, but you must remember to charge them.
– Choose wired for stationary recording.
– Choose wireless for mobility and spontaneity.
Understand your setting first. A Boya microphone works well either way, but only the right system matches your workflow. That decision shapes every recording you make.
Key Features to Look For in a Lapel Mic
A lapel microphone clipped near your collar solves a specific problem. In South African production circles, lavaliers capture voice clearer than camera mics for a fraction of the price. The capsule defines the sound of a boya microphone. Omnidirectional pickups capture audio evenly around the mic. Cardioid pickups focus forward and reject side noise, which helps in open-plan offices or busy studios.
The connector dictates your setup:
- TRRS jacks connect to smartphones and tablets.
- TRS jacks connect to cameras and audio recorders.
Cable texture counts. Stiff cables transmit rustle. Braided, softer cables stay silent against clothing. Windshields extend usability. Foam handles indoor rumble. Furry covers manage outdoor wind.
Clip grip strength determines placement security. Bundled accessories vary by model. A lead-weighted windscreen or spare clip proves useful during outdoor shoots.
How Boya Compares to Other Budget-Friendly Brands
Understanding Boya audio gear starts with noticing what the box contains. Other budget-friendly brands often strip their kits to the bare minimum. Boya includes practical items like rubberised clips and cable ties.
A boya microphone is built to be replaced cheaply, not repaired, which is typical for this price tier. That matters in South Africa, where shipping a unit back takes weeks. What separates a boya microphone from competitors is consistency. One unit sounds like the next. Many rivals show variance between batches. The frequency response stays stable, the housing stays intact, and the cable lies flat. You pay for predictability. That is worth more than a spec sheet with inflated numbers.
Choosing the Right Model for Your Setup
Matching the Mic to Your Camera or Smartphone
Connect the right piece, and your audio arrives intact. Connect the wrong piece, and you will hear nothing. The boya microphone lineup includes models built for cameras and models built for phones, yet the difference is not always obvious from the box.
A DSLR with a 3.5mm input accepts a wired lavalier instantly. A smartphone without a headphone jack needs a wireless receiver or a TRRS to TRS adapter to carry the signal. I have watched good recordings fail because the physical fit around the input was wrong. The power source and the plug configuration decide whether you record clean audio or produce nothing at all.
Evaluating Battery Life and Charging Options
Three in five South African creators have lost a take to load shedding. That statistic shapes how you evaluate battery life in a boya microphone. Choose a transmitter that holds a full interview charge, not a single sequence. A receiver that draws little power while idle will outlast one that drains itself waiting.
Battery indicators vary. Some Boya models show a simple LED, others provide a metered readout. Field work favours the LED. Studio sessions demand metered feedback. Charging options deserve equal attention. USB-C is standard, and fast charging means twenty minutes can salvage a dying unit.
- Standby draw is visible in the runtime figures
- The charging port should match your existing cables
- A charging case covers multi-day shoots
Evaluate the battery through real conditions, not spec sheets. I have seen a Boya unit record six hours at room temperature and fall short in Durban heat.
Understanding Pickup Patterns and Directionality
Selecting the right boya microphone begins with your transmitter and receiver layout. A single transmitter covers solo interviews. A dual system accommodates panel discussions. Your camera dictates the receiver connection, whether that is a 3.5mm jack or a USB-C dongle. Choose the architecture that matches your most frequent shoots.
Pickup patterns determine how the microphone hears the room. Omnidirectional capsules capture sound from every direction, which works for controlled studio sessions. Cardioid patterns reject off-axis noise, a critical feature for streetside shoots in Sandton or Cape Town.
– Omnidirectional: catches ambient sound, ideal for indoor dialogue
– Cardioid: focuses on the speaker, reduces background rumble
– Supercardioid: narrows the field further, best for loud environments
The boya microphone range offers both patterns across its models. Match the polar pattern to your shooting environment, not your preferences.
Selecting Between Omnidirectional and Cardioid Mics
On a windy Kloof Street, an omnidirectional boya microphone records the entire neighbourhood’s opinion along with your interview subject. Cardioid models ignore the amplified chaos and focus purely on the voice in front of them. That difference separates usable footage from sonic mayhem!
The right pick depends on your shooting environment, not your brand loyalty. Studio sessions reward an omnidirectional capsule’s generous sound field. Streetside interviews in Soweto or Sandton demand cardioid rejection to suppress passing minibus taxis.
- Measure ambient noise levels at your usual filming location
- Confirm whether your subject stays seated or walks around
- Decide how much room tone your final edit requires
A thoughtfully selected boya microphone saves you from hours of cleanup. Your editor will thank you.
Connector Types and Adapters You Might Need
Most microphone failures happen at the connection point, not the capsule. A boya microphone with a TRS jack plugs cleanly into a DSLR or mirrorless camera. Your smartphone, however, expects a TRRS pinout. Plug the wrong one in and you will capture silence or a hollow, distorted signal. I have watched editors curse a seemingly perfect recording because a cheap adapter introduced an electrical hum.
The right model depends on your actual rig. A shooter who moves between a Sony camera and an iPhone needs a unit with swappable cables or a bundled adapter. The Boya BY-M1 includes both TRS and TRRS cables. The BY-M1 Pro adds a phone splitter. The connector must match the recorder, not the brand.
- TRS for cameras and field recorders
- TRRS for smartphones and tablets
- USB-C or Lightning for direct digital input
Adapters solve some problems and create others. A 3.5mm to USB-C adapter forces a digital conversion step, altering the signal’s character. A boya microphone engineered for native USB-C avoids that conversion entirely, preserving the sound as the capsule captured it.
Setting Up for Interviews, Vlogs, and Filmmaking
Proper Placement of the Microphone on Clothing
A lapel mic clipped to a tie catches fabric rustle. The difference between crisp dialogue and muffled audio often comes down to a single centimetre. For interviews, position the boya microphone a fist’s width below the collarbone. This placement captures chest resonance without breath hiss or heartbeat thump.
Vlogs demand more freedom! Clip the mic to a collar or pocket edge, keeping the capsule exposed. Avoid burying it under a scarf or jacket lapel. Filmmaking is stricter. Hidden mics need clearance, so use a mount or tape to lift the capsule away from clothing.
Clothing material changes the sound. Cotton absorbs, nylon squeaks, and silk shifts. The boya microphone handles most fabrics well, but cable slack reduces transmitted noise. Test the position before you roll.
Managing Cables to Reduce Noise and Tangles
Once the position is set, the cable becomes the next problem. For interviews, route the boya microphone cable under the shirt and out at the side seam. This keeps the line invisible and stops the capsule from shifting when the subject turns their head. Vlogs are more forgiving, but only if you treat the cable as part of the frame. Let it hang with a natural loop, never taut.
Filmmaking punishes carelessness. A cable pulled tight against a door hinge or a chair leg will ruin a take. Use a strain relief loop near the connector, and tape the slack to the subject’s clothing. The boya microphone handles this well because its cable is pliable, but pliable also means tangle-prone.
- Coil the cable in a figure eight before storage.
- Use a small velcro strap to keep the slack bundled.
- Check the connector joint for stress before every shoot.
The cable is the quiet part of the signal chain. It deserves the same attention as the capsule.
Connecting Wireless Receivers and Transmitters
For interviews, connect the wireless receiver to your recorder and clip the transmitter to the subject’s lapel. The boya microphone captures dialogue without a cable crossing the frame. Set the channel, test levels, then roll.
Vlogging calls for a different setup. Plug the receiver into your phone using the right adapter for your device. Attach the transmitter to your collar. You get a clean feed while moving around freely, which suits run and gun shooting.
Filmmaking needs a robust signal path. Put the receiver on the camera cage and keep the transmitter within sight of it. Avoid blocking the antenna with metal objects, and you will get reliable audio every take.
Best Practices for Recording Two-Person Conversations
When two people sit down for a recording, the richer story moves into the pauses. A boya microphone captures both voices, but it must record the tension as much as the words. For interviews I clip the transmitter at the subject and let the receiver keep the recorder in the background, so the speaker talks to a person and then a device.
Vlogs change the shape of the chase. The host holds the phone, the guest carries the wire. Accent and tone arrival way off. The boya microphone reads the emotional border between you and the person beside you, and that matters for the true direction.
Filming two people for a narrative is a completely separate machinery. The distances shift every scene. I mark the positions of each actor and keep the transmitter toward the receiver. That prevents the sigh from turning into a hum.
- Give each voice its own channel.
- Adjust the levels before any lecture.
- Test the movement range for the whole scene.
With two people you fold the wireless it into something more trained. The boya microphone finds the middle and lets, it is the art of handing the quiet back to the right person.
Using Accessories Like Windshields and Clips
South African wind does not ask permission before it ruins a recording. A bare microphone picks up every gust, but a boya microphone with a proper windshield solves the problem before it starts.
For interviews, clip the transmitter to the subject’s collar, away from fabric that rubs. The receiver sits with the recorder, and the microphone captures both voices without forcing anyone to lean in.
Vlogs demand a different approach because the host moves and the guest shifts. Keep the microphone on a short lead, use the clip to secure it, and let the wind protection handle the open air.
Filmmaking needs control. A boya microphone attached with the right clip stays where you put it, even during movement.
Here is a practical setup:
– Fit the windshield before adjusting levels.
– Clip away from collars and jewellery.
– Test range before starting.
– Monitor with headphones.
Adjusting Audio Levels on Your Recording Device
Setting up a Boya microphone for interviews starts with pairing the transmitter and receiver. Confirm both units share the same channel, then place the recorder somewhere stable, like a jacket pocket or belt pouch. For vlogs, mount the receiver on your camera shoe and move around to test the signal range before recording. Filmmaking calls for a controlled sound environment, so disable nearby wireless devices and set a consistent input level on your recorder.
Adjusting audio levels on your recording device is the final step. Begin with gain at 40 percent, then speak at your usual volume or play a test tone from your phone. Raise the gain gradually until the meter shows strong peaks near minus 6 decibels. If the audio distorts, lower the gain. If it sounds too quiet, increase it in small steps. Always monitor with headphones to catch any clipping early.
Follow this sequence:
1. Power on the transmitter and receiver.
2. Set the Boya microphone to the correct frequency.
3. Adjust the gain while watching the meter.
This routine keeps your dialogue clear and prevents level surprises on set.
Optimizing Sound Quality in Different Environments
Reducing Background Noise in Outdoor Settings
Outdoor recording presents a unique set of acoustic hurdles that indoor spaces simply do not. Open air carries sound unpredictably, and ambient noise like rustling leaves or distant traffic can easily overwhelm a speaker’s voice. The boya microphone performs admirably here, but you must understand its limitations with airflow. Wind is the primary offender, creating low frequency rumbles that distort dialogue.
A simple windshield foam or a furry deadcat cover is essential equipment for any field session. Position the speaker with their back to the wind whenever possible for immediate results. Common outdoor noise sources to watch for:
– Distant road vehicles
– Air conditioning units on nearby buildings
– Crowd chatter from cafés
These environmental considerations transform a standard recording into a professional one. The boya microphone captures clarity when you actively manage the space around it.
Balancing Audio Levels for Indoor Room Tone
Indoor spaces hold a different kind of silence. Room tone, that quiet hum of a building’s life, often contains air conditioners and electrical currents. The boya microphone captures this baseline with surprising fidelity, yet the recorded level matters more than the surface sound. Balancing audio levels becomes a delicate act. Too hot, and the hiss becomes a roar. Too cold, and the voice loses its presence.
I always watch the device’s meter before speaking. Indoor environments rarely demand maximum gain. A modest setting allows the room tone to sit naturally beneath dialogue. Consider the common culprits that linger inside walls:
- Refrigerator compressors
- Fluorescent light ballasts
- Computer fans
Each source adds a layer that the boya microphone interprets. A clean room tone at the same level as speech makes editing seamless.
Using a Recorder or Interface for Better Preamps
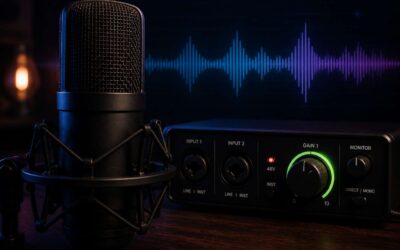
The boya microphone excels at capturing voice, yet the preamp determines whether that voice survives. Built-in camera inputs often lack the gain structure for quiet dialogue. A portable recorder or audio interface provides better preamps with lower noise floors. In a windy field or a reverberant hall, this difference becomes obvious. I have watched a clean recording turn into a muddy mess when the gain stage compressed the dynamics. The better preamp preserves the boya microphone’s natural response. It also allows you to record at moderate levels without hiss.
- Look for a recorder with at least 60 dB of gain.
- Check the equivalent input noise rating.
- Test the preamp before committing.
This approach changes how you capture room tone and speech alike.
Tips for Getting Clear Audio While Moving
Walking with a microphone changes the acoustic equation. Every step sends vibration through the cable, and wind pressure at a gentle pace can add 10 dB of low-frequency rumble. The boya microphone captures the voice cleanly, but the environment decides whether the take survives.
On a street with traffic or a beach with surf, background noise is constant. Move slowly, keep the mic pointed at the mouth, and avoid sudden turns that create gusts. I have watched a clean dialogue track collapse into a low rumble after a sprint across a parking lot!
- Keep the recorder on a separate strap, away from keys.
- Route the cable under the shirt.
- Use a fuzzy windscreen when the air moves.
Indoor spaces have their own traps. A corridor echoes, a kitchen hums, and a hall smears consonants. Walk slower and keep the boya microphone at a steady distance from the speaker. That consistency keeps dialogue clear while everything else moves.
Leveraging Mobile Apps to Fine-Tune Input Gain
Great audio is rarely about the microphone alone. The space around you shapes every recording, from the hum of a city street to the silent hush of a home office. The boya microphone captures your voice with clarity, but the environment injects its own character into the signal. A rushing fan, a distant train, or the echo of a bare room can muddy an otherwise pristine take.
Mobile apps have become powerful allies in this battle. You can now fine-tune input gain with a precision that was once reserved for studio hardware. Instead of accepting a noisy or distorted recording, you can watch the levels on your phone’s screen and adjust the signal before it ever hits the file. This real-time control makes a tangible difference when you are filming on location.
Consider these adjustments when using an app alongside your boya microphone:
- Set a conservative ceiling: Keep peaks around -6 dB to prevent clipping during loud moments.
- Use the high-pass filter: This removes low-frequency rumble, like air conditioners or traffic noise.
- Monitor with headphones: Your ears catch problems that a visual meter will miss.
Different environments demand different settings. Outdoors, wind is the primary adversary. Even with a windscreen, a sudden gust can create a low-end boom that overloads the input. Lowering the gain and relying on a closer microphone placement maintains a clean vocal presence. Indoors, the challenge shifts to room tone and reflections. A slightly higher gain can capture a softer speaking voice, but you must ensure that background buzz from appliances is not amplified to a distracting level.
The workflow is simple. Connect your boya microphone to your mobile device, open your preferred recording app, and perform a test phrase. Watch the meter while you speak at your normal volume. If the bars stay too low, raise the gain. If they touch the red zone, lower it. The goal is a strong, consistent signal without distortion. After thirty seconds of testing, you can trust that the settings will hold for the full recording session.
This level of control also handles dynamic moments. A quiet interview segment that suddenly becomes animated will not blow out, provided you left enough headroom. Conversely, a whisper can remain intelligible if you compensate with a bit of extra gain. The boya microphone maintains its broadcast-quality output across these shifts, but the app allows you to ride the level like a seasoned engineer. Ultimately, the combination of a solid microphone and a well-adjusted app gives you the freedom to capture professional audio in almost any setting.
Maintenance, Troubleshooting, and Longevity
Cleaning and Storing Your Lapel Microphone
A lapel microphone looks durable until you stuff it into a packed camera bag without thinking. The consequences appear later as crackle or dropped signal. For your boya microphone, longevity depends on three habits: cleaning, drying, and gentle handling.
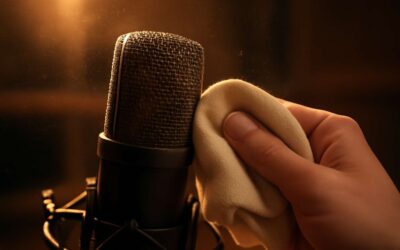
After each session, remove the foam windscreen and tap out dust. Wipe the metal grille with a dry cloth. If you record near the ocean, such as along the Garden Route, salt air leaves a corrosive film. Rinse the windscreen in lukewarm water monthly and let it dry completely.
When audio misbehaves, work through a logical sequence.
- Inspect the cable’s strain relief for kinks.
- Replace the battery with a fresh quality cell.
- Re-seat the 3.5mm connector into the transmitter.
Most problems are contact failures, not component failures. A careful connection and a clean grille will keep your boya microphone reliable for many seasons.
Replacing Cables and Connectors Over Time
The cable is always the first component to betray you. A boya microphone will outlast three of its own cords if you treat the connector poorly. That 3.5mm jack becomes a fulcrum for stress every time you walk, sit, or adjust your collar.
You will notice intermittent crackle first. Then the signal fades when you angle the plug a certain way. This is the cable’s internal shielding fracturing from repeated bending.
Check the strain relief before assuming the transmitter failed. Gently flex the cable near the connector. If the audio cuts out, you have found the problem. Replacing the entire cable is often cheaper and faster than attempting a solder repair unless you have steady hands and a fine-tipped iron.
Connectors also wear at the contact points. A transmitter’s input jack will loosen over hundreds of insertions. The answer is not to push the plug deeper or twist it, as this accelerates wear.
– Inspect the plug for bent or corroded contacts monthly.
– Confirm the locking mechanism, if present, engages with a clean click.
– Swap out stock cables for braided replacements with reinforced ends.
A boya microphone deserves a dedicated cable, not whatever rolls around in the bottom of your rucksack. The device’s capsule is robust, but its voice depends entirely on the integrity of that thin copper path. When you understand this, you treat every connection as a ritual rather than a convenience.
Fixing Interference or Dropout in Wireless Units
Interference shows up as silence or static, not the gentle crackle of a dying cable. A wireless boya microphone has its own failure modes. When the signal drops mid sentence, start with the environment rather than the gear. Radio waves behave differently indoors. Concrete walls, metal lighting rigs, and even your own torso between transmitter and receiver can create dead zones.
Check antenna orientation. Many receivers use two antennas, and they should form a wide V shape. Move the receiver closer and higher. Scan for competing signals if your unit allows manual channel selection. WiFi routers and LED drivers crowd the same spectrum.
– Change the frequency channel first.
– Power cycle both units before moving anything.
– Test with fresh batteries, since low voltage shrinks transmission range.
A boya microphone wireless kit tolerates a busy room, but it rewards a clear path. Walk the performance space and mark where the audio stutters. Often a simple quarter turn of the body restores the link completely.
Battery Care and Power Management Solutions
Longevity in any recording setup begins with how you treat the power source. The boya microphone wireless kit performs admirably, but its endurance depends entirely on the health of its cells. Lithium ion batteries thrive on consistent, partial discharge cycles rather than full drains. Charging the transmitter and receiver before they hit zero prevents voltage sag and maintains the internal protection circuitry.
Heat is the silent killer of portable electronics. Leaving a boya microphone in a parked car on a Highveld afternoon accelerates chemical degradation. Store the units in a cool, dry place, and remove the batteries if you plan to store them for a month or more. A gentle top up charge every few weeks keeps the cells active.
1. Avoid using the device while it is plugged into a power bank.
2. Use the original charging cable for optimal current delivery.
3. Replace batteries that show swelling or a rapid drop in runtime.
4. Calibrate the battery meter by running the unit until it powers off once a quarter.
Power management also involves the recording device. Some cameras supply phantom power that can stress the receiver. Use the supplied isolation adapter when connecting a boya microphone to a professional recorder. Clean the gold contacts on the charging pins with a dry cloth every few weeks. Oxidation creates resistance, which leads to longer charge times and shorter operational windows. With consistent care, the wireless system maintains its transmission range and audio clarity for years of use.
Checking for Firmware or Driver Updates
Your boya microphone’s hardware gets attention, but firmware deserves equal care. Regular updates fix glitches and improve audio stability. Before each session, check the official app for pending patches.
For troubleshooting, power cycle both units first. If static persists, re-pair them. On computers, a missing driver causes no audio input; reinstall it from device manager. For longevity checks:
- Inspect cables and connectors monthly.
- Clean charging contacts with a dry cloth.
- Verify firmware matches the latest release.
These small habits prevent big failures during shoots.
When to Upgrade Your Audio Setup
Most creators hold onto gear far longer than the audio quality justifies. In my experience, a boya microphone that has survived three years of field use still performs admirably, but only if you have maintained it properly. Regular cleaning and careful cable handling can stretch its life considerably. When repairs become more frequent than recordings, though, that is your signal!
Consider this: if you spend more time troubleshooting static and dropped signals than actually filming, the unit has moved from tool to burden. Wireless systems lose range as internal components age. A simple checklist helps me decide:
– Recurring connection failures
– Battery life under half its original runtime
– Audio degradation that persists after re-pairing
Longevity is about knowing when maintenance stops being economical. That moment justifies replacing it with a new boya microphone.
0 Comments